Arduino baserade twitter feed armband (2 / 2 steg)
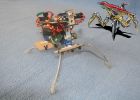
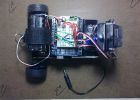
Steg 2: Bygga mottagaren


Bygga mottagaren är relativt lätt också, igen, ledningar i NRF24L01 är den knepiga biten. Följ nedanstående tabell och diagram över NRF24L01 :)
NRF24L01: Fungera: Nano Pin
1: GND: GND
2: VCC: 3.5v
3: CE: D9
4: CSN: D10
5: SCK: D13
6: MOSI: D11
7: MISO: D12
8: IRQ:
hittar du koden nedan och i den bifogade filen, kopiera bara och klistra in i arduino IDE:
#include
#include
#include
#include
#include
#include
#include
#include
#include
#define OLED_RESET 4
Adafruit_SSD1306 display(OLED_RESET);
#define NUMFLAKES 10
#define XPOS 0
#define YPOS 1
#define DELTAY 2
#define LOGO16_GLCD_HEIGHT 16
#define LOGO16_GLCD_WIDTH 16
#if (SSD1306_LCDHEIGHT! = 64)
#error ("höjd felaktig, snälla fixa Adafruit_SSD1306.h!");
#endif
int msg [1].
RF24 radio(9,10);
CONST uint64_t pipe = 0xE8E8F0F0E1LL;
int lastmsg = 1;
Sträng theMessage;
String theMessage1 = "";
void setup(void) {
Serial.BEGIN(9600);
radio.BEGIN();
radio.openReadingPipe(1,pipe);
radio.startListening();
display.BEGIN (SSD1306_SWITCHCAPVCC, 0x3C); initiera med I2C addr 0x3D (för 128 x 64)
init gjort
Visa bild buffert på skärmhårdvaran.
Eftersom bufferten är initierats med ett Adafruit splashscreen
internt, visas splashscreen.
display.display();
Delay(2000);
display.clearDisplay();
testscrolltext(theMessage);
Delay(2000);
display.clearDisplay();
}
void loop(void) {
om (radio.available()) {
bool = false;
klart = radio.read (msg, 1);
char theChar = msg [0];
om (msg [0]! = 2) {
theMessage.concat(theChar);
}
annat {
int meddelandestorlek = theMessage.length();
Serial.println(messageSize);
Serial.println(theMessage);
testscrolltext(theMessage);
Delay(5000);
display.display();
display.clearDisplay();
theMessage = "";
watchdogSetup();
String theMessage1 = theMessage.substring (0, (meddelandestorlek/4));
display.setTextSize(2);
display.setTextColor(WHITE);
display.setCursor(0,0);
display.println(theMessage1);
display.display();
Delay(5000);
String theMessage2 = theMessage.substring((messageSize/4), (meddelandestorlek/2));
display.clearDisplay();
display.setCursor(0,0);
display.println(theMessage2);
display.display();
Delay(5000);
String theMessage3 = theMessage.substring((messageSize/2), ((messageSize/4) * 3));
display.clearDisplay();
display.setCursor(0,0);
display.println(theMessage3);
display.display();
Delay(5000);
String theMessage4 = theMessage.substring(((messageSize/4)*3), meddelandestorlek);
display.clearDisplay();
display.setCursor(0,0);
display.println(theMessage4);
display.display();
Delay(5000);
Serial.println(theMessage1);
Serial.println(theMessage2);
Serial.println(theMessage3);
Serial.println(theMessage4);
display.clearDisplay();
theMessage = "";
}
}
}
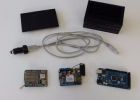
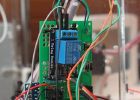
När alla anslutna och kollade till vara arbetande bandet var 3D tryckt på en DaVinci Jr med PLA. Bifogad fil. Komponenterna som hölls på plats med varmt lim.
Några frågor, fråga Vänligen :)
Arduino LCD Twitter display
Arduino-baserad byta spänningsregulatorer
Spåra din bil med en Arduino-baserad Lojack
Att införa Climaduino - Arduino-baserad termostaten du styr från din telefon!
Arduino-baserad Bi-color LED Matrix Flappy fågeln spel

Arduino-baserad skugga larm
Låg höjd miljöövervakning med en Arduino baserade väder Instrument och Aeropod Remote Sensing plattform
Montering en Arduino baserade rök / värme larm
Mobile Robotics med repa: bygga en Arduino-baserad insekt-liknande Walker och programmera den med Scratch
Daves dans i en en Arduino baserade Motion känsliga ljus kostym
Arduino baserade Robotic Car(wireless controls+Autonomous)
Sondering och fräsning ett kretskort med en Arduino-baserad CNC
Arduino-baserad robot med IR radar
DIY Arduino baserad MIDI fot Controller

Arduino baserade Encrypter

InPace - en Arduino baserad GPS-data logga fitness armband med bluetooth och en iOS app
Baserade Arduino enkel Blind Navigation armband (AIDA1)
Arduino-baserad Split-flik spel