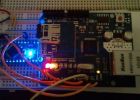
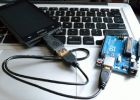
Arduino-Android LED styr med hjälp av Ethernet Shield (3 / 4 steg)
Steg 3: skriva din xml
< RelativeLayout xmlns:android = "http://schemas.android.com/apk/res/android"xmlns:tools = "http://schemas.android.com/tools"
Android: layout_width = "match_parent"
Android: layout_height = "match_parent"
Android: paddingBottom = "
Android: paddingLeft = "
Android: paddingRight = "
Android: paddingTop = "
verktyg: sammanhang = ". MainActivity">
< TextView
Android: id = "
Android: layout_width = "wrap_content"
Android: layout_height = "wrap_content"
Android: layout_gravity = "center"
Android: text = "Arduino enkel Automation"
Android: textAppearance = "? android: attr / textAppearanceLarge" / >
< LinearLayout
Android: id = "
Android: layout_width = "fill_parent"
Android: layout_height = "wrap_content"
Android: layout_alignLeft = "
Android: layout_below = "
Android: orientering = "horisontell" >
< knappen
Android: id = "
Android: layout_width = "100dp"
Android: layout_height = "100dp"
Android: layout_weight = "0,39"
Android: text = "LED 1 ON" / >
< knappen
Android: id = "
Android: layout_width = "100dp"
Android: layout_height = "100dp"
Android: layout_weight = "0,39"
Android: text = "LED 1 OFF" / >
< / LinearLayout >
< LinearLayout
Android: id = "
Android: layout_width = "fill_parent"
Android: layout_height = "wrap_content"
Android: layout_alignLeft = "
Android: layout_alignRight = "
Android: layout_below = "
Android: orientering = "horisontell" >
< knappen
Android: id = "
Android: layout_width = "100dp"
Android: layout_height = "100dp"
Android: layout_weight = "0,39"
Android: text = "LED 2 ON" / >
< knappen
Android: id = "
Android: layout_width = "100dp"
Android: layout_height = "100dp"
Android: layout_weight = "0,39"
Android: text = "LED 2 OFF" / >
< / LinearLayout >
< / RelativeLayout >
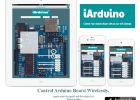
Styra Arduino styrelsen trådlöst med iPhone, iPad eller iPod med iArduino App och Ethernet Shield
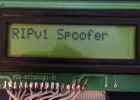
Arduino Routing Protocol RIPv1 Spoofer / nätverk Jammer - Ethernet Shield handledning
[Tutorial för 4DIY.ORG] - hur man styr LED med iphone med hjälp av [4DIY.ORG] App och Ethernet Shield
Arduino Nano med Ethernet Shield

Styra en arduino projekt genom en anpassningsbar android / Iphone app med Blynk och Wemos D1: 2016 SUPER NOOB VÄNLIGT sätt

LED kontroll med hjälp av Arduino Bluetooth och Android. (Del 1)
Styr Ikea Dioder LED Strip med Arduino + 16 X PWM LED Fader styrelsen
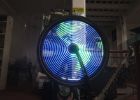
Hur man bygger en 8 x 8 x 8 LED cube och styra med en Arduino

ArduDroid: En enkel 2-sätt Bluetooth-baserade Android Controller för Arduino RGB led strip
8 x 8 LED Pong med Arduino

LED paraply med Arduino

RGB LED Snowboard med Arduino Uno R3
Styra Arduino trådlöst med MATLAB
Lätt Bluetooth aktiverat dörr lås med Arduino + Android
LED-ljus med en Arduino
Röst aktiverat LED-belysning med Arduino
Arduino Android USB-seriell kommunikation med OTG kabel
Programmera en Arduino på språng med din Android-telefon eller surfplatta