R/C LEGO® "The Bull" Buggy (6 / 13 steg)
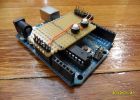
Steg 6: Palm Arduino V3 & Motor PCB


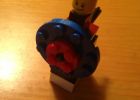
Foto 1 Fortsätt från föregående steg
Foto 2, 3, 4, 5, 6 Två 1 x 6 Technic tegelstenar (#3894) och fyra 1 x 6 tallrik (#3666)
Bild 7, 8 Två 1 x 12 Technic tegel (3895) och 2 x 6 Technic plattan (#32001)
Foto 9, 10 Fyra Connector Peg med friktion (#2780) och två 1 x 4 Technic tegel (#3701)
Bild 11, 12 Två kontakt Pin med friktion (#2780)
Bild 13, 14 Två axel Joiner (#6538b) och arga axel 2M med Groove (#32062)
Foto 15, 16 Två Cross axel 3M (#4519)
Foto 17, 18 Två Bush för Cross axlar (#6590)
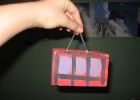
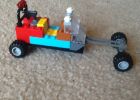
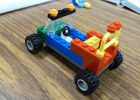
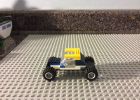
Foto 19 Installationen av Palm Arduino och Motor Controller Base.
Bild 20, 21 Två 6,5 L stötdämpare (#731 c 01)
Foto 22, 23 Två 1 x 6 Technic tegel (#3894)
Foto 24, 25 Två 2 x 2 plattor (#3022) och två 1 x 4 Technic tegel (#3701)
Bild 26, 27 Två 1 x 1 Technic tegel med 1 knopp (#87087)
Foto 28, 29, 30 Två Technic nivå 3M (#6632) och fyra Connector Peg/Cross axel (#6562)
Foto 31, 32 2 x 8 Technic plattan (#3738)
Foto 33, 34 Fyra 1 x 1 runda plattor (#6141)
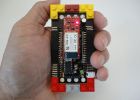
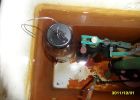
Bild 35 Detta foto visar anslutningen av Arduino och Motor Controller PCB och motor, 3.7V batteri för Arduino och XBee modul, Servo och 7.4V batteri för motor. PCB finns 5V regulator för Servo strömförsörjning.
Trådlös LEGO Race bil Redux

"12 tummen" R/C LEGO Dragster
Palm Arduino Plus

Elegant side bulle med Makeup
Miniatyr flytta gondol

Hur man gör en Taco Bell Mild sås Packet kostym
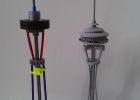
K'nex Seattle Space Needle V2

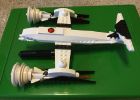
Enkla pappersflygplan: Tjuren
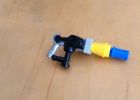
Spara lite vatten... Med vatten!?

Hur man Troll Penolopy BULLnick
VÄPNADE Lego Buggy

The Justice Lego League of America
LEGO Buggy
LEGO Dune Buggy
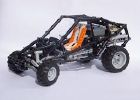
LEGO Technic Buggy.
Futuristiska Lego Gun (Vänligen läs The slutet av detta Instructable)
The Tigershark A LEGO Spaceship
Högt objekt buller leksak (AKA The Arduino ljud maskin)